Ubuntu: Set up a virtual environment with IPython, numpy and pandas

So this is a much needed update for an earlier post on setting up a
virtual environment. The original post was based on one I found
http://technomilk.wordpress.com/2011/07/27/setting-up-our-django-site-environment-with-pythonbrew-and-virtualenv/. My prior post is https://mofj.commons.gc.cuny.edu/2013/06/25/setting-up-a-virtual-environment-with-ipython-numpy-and-pandas/. Most of the time you read about setting up virtual environments, it is in the context of web development. But the same benefits hold for analysis and research software. You want to be able to reproduce results. It also increases security not to be adding all
the unverified libraries with root level privileges. This post is a
minor modification of the outstanding tutorial I have been using for
the last few months. There are three reasons why this needs to be updated:
– there is another version of python
– it does not cover IPython
– pythonbrew which managed the versions of python is longer maintained
I will repeat the steps here. First install the c libraries that python needs to function.

I use apt-get in ubuntu so type

$ cd ~

$ sudo apt-get install libsqlite3-dev libbz2-dev libxml2-dev libxslt-dev curl

Get a non-system version of python

Then install the pyenv scripts from source. Here is the link for pyenv https://github.com/yyuu/pyenv#basic-github-checkout. Pyenv is in many ways more
sophsticated than pythonbrew. It is written in http://en.wikipedia.org/wiki/Bash_shell not any particular version of python. The advantage is that it is not
dependent on anything in the language itself. The disadvantage is that it is much harder
to read the code and understand the nature of a bug. As my advisor always used to tell
me there was nothing more brain-dead than a shell, I have spent most of my time avoiding them. I use the Bourne Again Shell that comes with Ubuntu. The syntax is tricky because everything is a string. Variable definitions can’t have any spaces. There are some good tutorials which I will include later. For now, here are three links that can tell you
the differences between bash and an interpreted language like Python.
– http://askubuntu.com/questions/110907/python-compared-to-bash
– http://superuser.com/questions/414965/when-to-use-bash-and-when-to-use-perl-python-ruby
– http://stackoverflow.com/questions/209470/can-i-use-python-as-a-bash-replacement

I am assuming you have git installed. If not, https://www.digitalocean.com/community/articles/how-to-install-git-on-ubuntu-12-04 is a good tutorial for installing git.

$ cd ~
$ git clone git://github.com/yyuu/pyenv.git .pyenv

Define environment variable PYENV_ROOT to point to the path where
pyenv repo is cloned and add $PYENV_ROOT/bin to your $PATH for access
to the pyenv command-line utility.

$ echo ‘export PYENV_ROOT=”$HOME/.pyenv”‘ >> ~/.bashrc
$ echo ‘export PATH=”$PYENV_ROOT/bin:$PATH”‘ >> ~/.bashrc

Add pyenv init to your shell to enable shims and autocompletion. Shims and binstubs are worth knowing about.  You can read up on them https://github.com/yyuu/pyenv#understanding-shims.

$ echo ‘eval “$(pyenv init -)”‘ >> ~/.bashrc

Restart your shell so the path changes take effect. You can now begin using pyenv.

$ exec $SHELL

Install Python versions into $PYENV_ROOT/versions. For example, to install Python 2.7.5, download and unpack the source, then run:

$ pyenv install 2.7.5
$ pyenv rehash

And now we have to tell the system to use this new version of python

$ pyenv local 2.7.5

Install virtualenv

We are going to do two tricky things we are going to install
virtualenv in the version of python AND install the pyenv plugin virtualenv.

$ pip install virtualenv

and to install the pyenv plugin.

$ git clone git://github.com/yyuu/pyenv-virtualenv.git ~/.pyenv/plugins/pyenv-virtualenv

You are now ready to create a virtual environment in a non-system version of python. I don’t understand why this will not work if you are anywhere else.

$ cd ~/.pyenv/versions/2.7.5
$ pyenv virtualenv

We can list all of the virtual environments. Change directory to the
one you want to work in and in my case the virtual environment is
no-more-drug-war:

$ pyenv shell no-more-drug-war:

We can list the virtualenvs:

$ pyenv virtualenvs
dssg (created from /usr)
lc (created from /usr)
* no-more-drug-war (created from /usr)
scrp (created from /usr)
seek (created from /usr)

We can activate the virtual environment with the following command.

$ pyenv activate no-more-drug-war

You can deactivate the activate’d virtualenv by pyenv deactivate.

$ pyenv deactivate

So, in order to know what packages we have installed at any time, we install yolk.

$ pip install yolk

Do not type sudo! To see what it installed at any time:

$ yolk -l

A list of further packages for IPython are available here. Type these individually and they each may take a few minutes to install.

$ pip install jinja2

$ pip install pyzmq

$ pip install pygments

$ pip install tornado

$ pip install nose

$ pip install numpy

$ pip install scipy

$ pip install matplotlib

$ pip install pandas

$ pip install ipython

Turning it on and off

Now to get out of your virtual environment, just type

$ pyenv deactivate

To get back in, type:

$ pyenv activate no-more-drug-war

Good luck!

I will try to send a pull request to add some of this to pyenv and correct my question on stack overlfow.

Emacs IPython Notebook and the shaving of a Yak

It was this week during the project pitch exercise here at the Data Science For Social Good that I fell down a rabbit hole.  I wanted to get summary statistics on foreclosures and land values for each of Chicago’s 50 wards.  Of course I was not doing that when the well known data scientist and volunteer mentor Max Shron approached me I was fiddling with my editor. He politely introduced me to the concept of a “Yak Shave.”  As the definitive source of programming slang, the Jargon file defines it:

yak

[MIT AI Lab, after 2000: orig. probably from a Ren & Stimpy episode.] Any seemingly pointless activity which is actually necessary to solve a problem which solves a problem which, several levels of recursion later, solves the real problem you’re working on.

Now there is some disagreement over whether this is a term of derision. Wikitionary includes an alternate meaning:

The actually useless activity you do that appears important when you are consciously or unconsciously procrastinating about a larger problem.

I thought I’d get more work done if I just fixed a problem with my .emacs file, but then I spent the whole afternoon yak shaving.

gerwinski-gnu-head

This was what Max was gently chiding me for.  After all, I am a PhD student our lives are devoted to the idea of Yak Shaving, even if we don’t have a name for it.  We all want to make our projects work without admitting to our advisers that we are stuck on step 3 of our weekly 50 part research assignment.  So I put down my fiddling and went to the meeting but I did not forget about it.  The culture of our group is nothing if not polite and friendly.

Now the truth is that this piece of out is slightly over 1 GB and I could have done all of my data cleaning in R.  However we all know that Python and Pandas are the better tools and we are trying to come up to speed quickly.  (For those of us on twitter, John Myles White, has been working on the next interpreted language to enter the speed wars, Julia). This idea of yak-shaving had me giggling for an hour.  I am a recent convert to gnu/linux and  the gnu part of that partnership is FREE Software with deep collectivist roots and installation procedures reminiscent of Dostoevsky novel if it works or years in Gulag if they don’t.  Their GNU mascot looks like a close relative of the Yak.

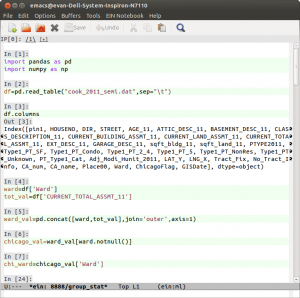
IpythonNotebookInEmacsEven the Wikitionary entry on useless yak shaving mentions the notoriously arcane .emacs file that needs to be constantly configured. These days may be coming to an end.  Not that I did not spend the better part of a sick day fiddling with it to get two pieces of canonical free software virtuosity, Fernando Perez‘s IPython and Richard Stallman‘s Emacs to play together well.  First, I found the brilliant ein library by Takafumi Arakaki.  But that alone did not shave the Yak.  I had to abandon my ad-hoc plugins for emacs and come to terms with Emacs’ three package managers.  It was MELPA tutorial from the indefatigable Xah Lee that worked for me.  Details will follow but here is a screen shot so you know that it is possible you to shave this Yak! …And in a lot less time than it took me.


Setting up a virtual environment with Ipython, numpy and pandas

Most of the time you read about setting up virtual environments, it is for web development.  But the same benefits hold for analysis and research software.  You want to be able to reproduce results.  It also increases security not to be adding all the unverified libraries with machine level privileges. This post is a minor modification of the outstanding tutorial I have been using for the last few months.  Since it is two years old, there is another version of python and it does not cover IPython, I will repeat the steps here.

First install Pythonbrew and another version of python

I use apt-get in ubuntu so type

$ cd ~

$ sudo apt-get install libsqlite3-dev libbz2-dev libxml2-dev libxslt-dev curl

then get pythonbrew

$ curl -kL http://github.com/utahta/pythonbrew/raw/master/pythonbrew-install | bash

This line gets the repository and executes through bash.  We will need to modify the configuration file for bash.

$ echo "source $HOME/.pythonbrew/etc/bashrc" >> ~/.bashrc

Don’t forget the dot in .bashrc.  Now nothing changes until this file is executed by the operating system:

$ source .bashrc

This should complete with no errors.  The next step is to install python 2.7.3.  It is going to take a few minutes to complete.

$ pythonbrew install --verbose 2.7.3

And now we have to tell the system to use this new version of python

$ pythonbrew use 2.7.3

Install virtualenv and virtualenvwrapper

We have to install virtualenv in the system’s python and virtualenvwrapper in the new python.

$ sudo apt-get install python-virtualenv

$ pip install virtualenvwrapper

The first line only needs to be executed once.  It works for the whole system.  The second one needs to be done for each new python environment you create. Make a hidden directory to hold the virtual environments.

$ mkdir ~/.virtualenvs

Add the following three lines at the end of your .bashrc.

$ export WORKON_HOME=$HOME/.virtualenvs
$ export VIRTUALENVWRAPPER_PYTHON=$HOME/.pythonbrew/pythons/Python-2.7.3/bin/python
$ source $HOME/.pythonbrew/pythons/Python-2.7.3/bin/virtualenvwrapper.sh
You will need to use an editor.  Then you have to reload them:
$ source .bashrc

Create the virtual environment


To create a virtual environment called ‘no-more-drug-war’, type:

$ mkvirtualenv --no-site-packages no-more-drug-war

Important libraries

So, in order to know what packages we have installed at any time, we install yolk.

$ pip install yolk

Do not type sudo!  To see what it installed at any time:

$ yolk -l

A list of further packages for IPython are available here.  Type these individually and they each may take a few minutes to install.

$ pip install pyzmq

$ pip install pygments

$ pip install tornado

$ pip install nose

$ pip install numpy

$ pip install scipy

$ pip install matplotlib

$ pip install pandas

Turning it on and off

Now to get out of your virtual environment, just type

$ exit

To get back in, type:

$ workon no-more-drug-war

Good luck!

Emacs-IPython-Notebook Installation Tutorial

The Emacs package system is far from perfect.  The most proficient users of Emacs are unaffected by this flaw.  Many users of Emacs are experts who live at the bleeding edge of the linux kernel and gcc compiler.  This guide is for the mere mortals who have used Emacs for either its superb integration with R through ESS or the Carsten Dominick’s ubelieveable org-mode that threatens to make even PhD students productive. Basic Emacs is extraordinarily powerful and you can add a few packages with minimal knowledge.  Vincent Goulet has helped thousands of frantic stats students with his Modified Emacs for Windows/Mac OSX.  However as you want to move past that you have to add packages yourself.

Gods vs Mortals

All packages can be downloaded as source.  This can be very tricky as many packages depend on other packages which can be hard to configure for us mere mortals.  When possible it is advisable to avoid this and use a trusted repository.  A repository pools the effort and when possible automates the effort involved in keeping up to date.  This is important as bugs and security flaws in all software are discovered over time.  In this tutorial, I am going to install such a package. Another amazing piece of scientific computing is Fernando Perez’s IPython.  See my other blogpost about setting up a virtual environment for IPython.  The notebook whose developed was led by Brian Granger and Min Reagan Kelly revolutionizes both interactive computing and computer language pedagogy.  No single blog is long enough to defend such grandiose claims, but I am pretty amazed.  I just hate editing in the browser.

The Package Systems

The best blog post I found on the emacs package system was from Xah Lee.  I will work hard to add something here. There are six package systems in emacs 24.x. They are:

http://elpa.gnu.org/
http://tromey.com/elpa/
http://marmalade-repo.org/
http://melpa.milkbox.net/
http://www.emacswiki.org/emacs/DELPS
http://www.emacswiki.org/emacs/el-get

The first is the official system.  I am not going to cover tromey, marmalade-repo or DELPS.  I just don’t know them yet.  I was able to install other packages successfully in el-get.  It did not work for me with the Emacs-IPython-Notebook.

Let’s get started

So you may not have a .emacs file.  This file loads all of your customization files into emacs. Create it if you don’t.

$ touch .emacs

Now find it C-x C-f ~/.emacs (The capital ‘C’ means control.)

Add the following lines:

(setq package-archives ‘((“gnu” . “http://elpa.gnu.org/packages/”)
))

(when (>= emacs-major-version 24)
(require ‘package)
(package-initialize)
(add-to-list ‘package-archives ‘(“melpa” . “http://melpa.milkbox.net/packages/”) t)
)

This adds melpa to your repositories. You also need to add the line

(load-theme ‘zenburn t)

to get the zeburn theme (better colors).

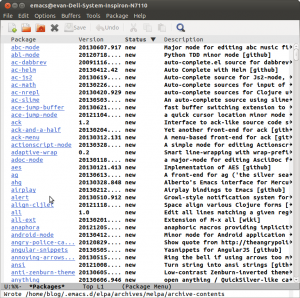
package-menuNow to list all the available packages. Type M-x package-list-packages.  (M means Meta on most keyboards that is the Alt key. Also use tab completion if possible, it helps!)  We are going to take two packages.  Takafumi Arakaki’s brilliant ein and the zenburn theme colors. Type C-s to search for ein in the package list, not the github repo.  As of now you have to look for the second one in the file. Go to the beginning of the line to type ‘i’ which marks the package for installation and x which will signal emacs to actually install it.  Repeat the same for the zenburn package.

Load it into Emacs to see the change

But for any of this to work you have to re-run the .emacs file.  Type M-x eval-buffer.

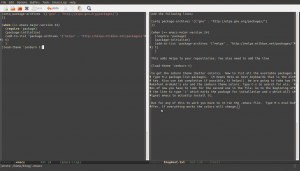
newColors If everything works the colors will change.  You can examine repository for this post including a working .emacs file (and my personal .emacs file) at my github repo which is linked here.

Now to start the notebook.  Go to the directory with a notebook or where you want to keep them and open a new shell. Type

$ ipython notebook –pylab=inline

Back in emacs type.

The pay-off

M-x ein:notebooklist-open

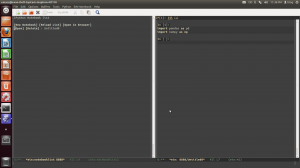
Click on open new notebook and your IPython notebook is in your buffer where it always belonged.

ein I will cover el-get in the next blog….I promise!

Resources on Django and D3

It is no secret that I have been working on delivering d3 over django.  I am a novice to both of these technologies, I have been scouring the internet for FREE resources.  Of what I have found.  Here are my impressions.  On Django, there seem to be few full tutorials analogous to  Michael Hartle’s book.   However what there is works.  The early version’s of Michael’s book were hell if you did not have the latest $2,500 Mac.  The Django official tutorial  was manageable.  It should really spend time telling you to set up a virtual environment but you can find that material in Technomilk.  There is also a very good book by John Bennett of Django’s main authors but is behind a pay-wall. The reason that I am switching to django  is that there is a growing number of resources for scientific computation (apologies, this is behind a pay-wall) in python.  I believe that it will emerge as a successor to the R statistical language.  If you are still using R, you should check out IPython, pandas, numpy and scipy.  Also I have not finished them but there is another FREE (video) tutorial, Getting Started with Django, for after you have finished the official one.

The other great strength of R is its graphics, both the base graphics and ggplot.  (Truth be told, I found that indecipherable without the companion book, which is of course behind a pay-wall.) However as data presentation evolves from static graphs to user interfaces, we need to move to tools like D3 which allow us to create graphs from html styling elements.  These are also called svg or css graphics.  Right now there are only two books on the subject.  Mike Dewar’s Getting Started with D3 and Scott Murray’s Interactive Visualization for the Web.  Mike’s book is strictly limited to D3 and was hard for me to get a clear idea of what is going on because of my own limitations in HTML and CSS.   Both books say that they are only going to explain D3 but Murray’s book and free tutorials explains more of the background.  making it easier to understand what is happening.  There are more small examples so you can draw circle or rectangle before you draw a scatter plot.  Both Mike and Scott’s book make a github repository available so you can see full examples of what is in the text.  With Mike’s book  some of what is in the repository is different than what is printed in the text.  This is particularly frustrating on the Subway wait user interface.  This is not to trash Michael’s book.  I at least understood something after reading it.  Looking at the documentation from M Bostock made me feel like a complete idiot.

Learning environments for data analysis software

Welcome to my blog

This is my first blog post using the iPython notebook. I am very excited about the things it can do. Here is what I want to cover:

  • Who I am
  • What the blog will cover
  • Why I named it Measure of Justice

Evan Misshula

I am a PhD student in Criminal Justice. I try to use social networks and data mining to help people make rational decisions about public safety. I care passionately about people that the world writes off. It is no shock. There have been many times when I have been written off.

Math, Computing, Causality, Networks, Security and Ethics

Early in my graduate career, I was struck that we spend a great deal of effort policing minority communities for drug use which has little effect on the non-involved but spend way less effort protecting the banking system from hackers. I also thought that there was a lot to learn about managing threats from inside by looking at both intrusion detection and counter- intelligence. Not suprisingly, I believe in second chances. Who gets those chances and when they come are an area of great interest.

What’s in a name?

When I studied Stochastic Control, Girsanov’s Theorem governed which measures
were deformable into each other. Two measures needed to have the same sets of measure zero, to equivilent. In other words it is what we think that is impossible, not unlikely that is important.

My favorite new toy

I am excited about blogging again because I can now put code and math in the blog. I have spent a lot of time in graduate school learning new tools. This blog will hopefully document some of the challenges and help others find their way. Others blogs have certainly helped me.

We can assign variables in the ipython notebook.

In [28]:

a=5
print a
5

In [30]:

a=5
b=9 a+b 

Out[30]:

But you can also reach into the operating system and execute bash commands.

In [31]:

pwd

Out[31]:

u'/home/evan/Documents/ipython/blog/blog'

In [32]:

ls
120907-Blogging with the IPython Notebook.ipynb EvanNB1.html old/
121120-Back from PyCon Canada 2012.ipynb EvanNB1.ipynb EvanNB1_header.html fig/

This is a markdown cell

You can italicize and use boldface. It allows us to comment code and create interactive presentations. You can build lists of your favorite tools. Here are mine.

  • linux
  • emacs
  • r statistical language
  • Emacs Speaks Statistics
  • Org-mode
  • LaTeX
  • Sweave
  • Ggplot

What is most important is to LaTeX support. My favorite math equation is $e^{i\pi}+1=0$. It can also render math numbered equations:
$$e^x=\sum_{j=0}^{\infty}\frac{x^j}{j!}$$

The browser displays

The program can display the numeric or character output of programs.

In [33]:

print "hi Doug"
x=3 
hi Doug

In [9]:

x

Out[9]:

3

It can also display graphs:

In [34]:

%pylab inline
plot(rand(100))
Welcome to pylab, a matplotlib-based Python environment [backend: module://IPython.zmq.pylab.backend_inline].
For more information, type 'help(pylab)'.

Out[34]:

[Line2D(_line0)]

In [35]:

x = linspace(0, 3*pi)
plot(x, 0.5*sin(x), label=r'$\sin(x)$') plot(x, cos(x), 'ro', label=r'$\cos(x)$') title(r'Two familiar functions')
legend()

Out[35]:

Legend

Symbolic Manipulation

The ipython notebook can also make symbolic calculations and solve complex algebraic equations:

In [36]:

%load_ext sympyprinting import sympy as sym
from sympy import *
x, y, z = sym.symbols("x y z")
The sympyprinting extension is already loaded. To reload it, use: %reload_ext sympyprinting

In [37]:

Rational(3,2)*pi + exp(I*x) / (x**2 + y**2) 

Out[37]:

$$\frac{3}{2} \pi + \frac{e^{\mathbf{\imath} x}}{x^{2} + y^{2}}$$

In [38]:

eq = ((x+y)**3 * (x+3)) eq

Out[38]:

$$\left(x + 3\right) \left(x + y\right)^{3}$$

In [39]:

expand(eq) 

Out[39]:

$$x^{4} + 3 x^{3} y + 3 x^{3} + 3 x^{2} y^{2} + 9 x^{2} y + x y^{3} + 9 x y^{2} + 3 y^{3}$$

Ipython can even calculate the derivative!!

In [40]:

diff(cos(x**2)**2 / (1+x)**2, x)

Out[40]:

$$- 4 \frac{x \operatorname{sin}\left(x^{2}\right)
\operatorname{cos}\left(x^{2}\right)}{\left(x + 1\right)^{2}} – 2 \frac{\operatorname{cos}^{2}\left(x^{2}\right)}{\left(x +
1\right)^{3}}$$

It can also display pictures and videos…

In [19]:

from IPython.display import Image
Image(filename='/home/evan/Pictures/Evan.jpg')

Out[19]:

In [20]:

from IPython.display import YouTubeVideo
YouTubeVideo('ystkKXzt9Wk') 

Out[20]:

We can even use other languages (including R)!!

This is because ipython communicates between the kernel and the browser so it knows how to send data to
another interpreter.

In [41]:

%%ruby puts "Hello from Ruby #{RUBY_VERSION}"
Hello from Ruby 1.9.3

In [42]:

%%bash echo "hello from $BASH" 
hello from /bin/bash

In [23]:

import rpy2;
from rpy2 import robjects; robjects.r("version")

Out[23]:

_
platform x86_64-unknown-linux-gnu
arch x86_64
os linux-gnu
system x86_64, linux-gnu
status
major 2
minor 15.2
year 2012
month 10
day 26
svn rev 61015
language R
version.string R version 2.15.2 (2012-10-26)
nickname Trick or Treat 

In [24]:

%load_ext rmagic
The rmagic extension is already loaded. To reload it, use: %reload_ext rmagic

In [25]:

X = np.array([0,1,2,3,4]) Y = np.array([3,5,4,6,7])

In [26]:

%%R -i X,Y -o XYcoef
XYlm = lm(Y~X)
XYcoef = coef(XYlm)
print(summary(XYlm))
par(mfrow=c(2,2))
plot(XYlm)
Call:
lm(formula = Y ~ X)

Residuals:
1 2 3 4 5
-0.2 0.9 -1.0 0.1 0.2

Coefficients:
Estimate Std. Error t value Pr(>|t|)
(Intercept) 3.2000 0.6164 5.191 0.0139 *
X 0.9000 0.2517 3.576 0.0374 *
---
Signif. codes: 0 ‘***’ 0.001 ‘**’ 0.01 ‘*’ 0.05 ‘.’ 0.1 ‘ ’ 1

Residual standard error: 0.7958 on 3 degrees of freedom
Multiple R-squared: 0.81,	Adjusted R-squared: 0.7467
F-statistic: 12.79 on 1 and 3 DF, p-value: 0.03739

In [27]:

XYcoef

Out[27]:

[ 3.2  0.9]

There is more to come. Ipython does d3 interactive graphs but I have not been able to get them to work. It also handles cython (python wrapped c-code) and
mpi parallel code. More later. It is time for bed.

Intro and iPython

So I was able to get this to post to my Measure of Justice. However I was not able to get it to work here. Since then, to my surprise I have found myself working less with the visually amazing, but temperamental iPython and more with Emacs org-mode.

The ability to toggle between thirty different languages and output to html or LaTeX is pretty overwhelming. This is not to say that I have had no trouble at all. Python sessions were broken for a while. Overall it has been a pleasant experience. If you are interested start with the article in the Journal of Statistical Software. But that is just the advertisement for what it can do. To master the usage you should go to the supplementary materials. You can download both the source code for the paper and the babel library. None of this is behind a pay-wall.

Here are the tricks:

1. The paper uses an initialization file, but you don’t need to do that. I generally just put an elisp block in the paper and execute that.

2. They defined a Journal of statistical software class to comply with formating requirement. You will generally just output to LaTeX

3. Any questions, just reach out to me on Twitter @emisshula